Simple Family Organization:
Make Mornings Easy With Morning Organization Magnets!
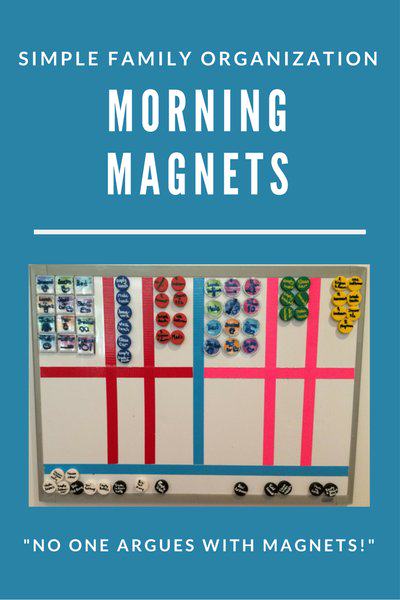
Resolve Chaos with “Morning Organization Magnets!”
Solves the problem of: chaotic, rushed mornings with lots of nagging and yelling!
Added benefit(s): The “morning magnets” were so effective for morning organization, we also added “after school” and “bedtime” magnets to manage recurring, daily tasks.
For better or worse, my best ideas always come when I’m fed up! Ticked off! Had enough and not-gonna-let-myself-go-through-this-ever-again!
That feeling finally caught up with me over getting out of the house in the morning. When I realized I had just spent more energy in the first 90 minutes of my day than I would for the following 14.5 hours, it was time to take action!
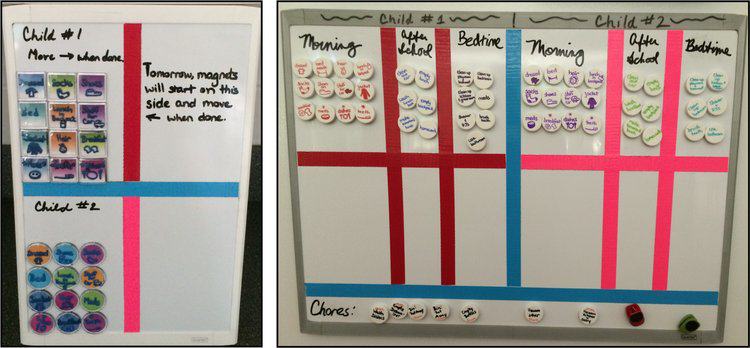
“How can I get my children to take more initiative in the morning?” I wondered. After some trial and error, I developed this Morning Magnet board. It was so successful, we quickly added “after-school” and “bedtime” magnets. The photo below shows our progression…
NO ONE ARGUES WITH MAGNETS!
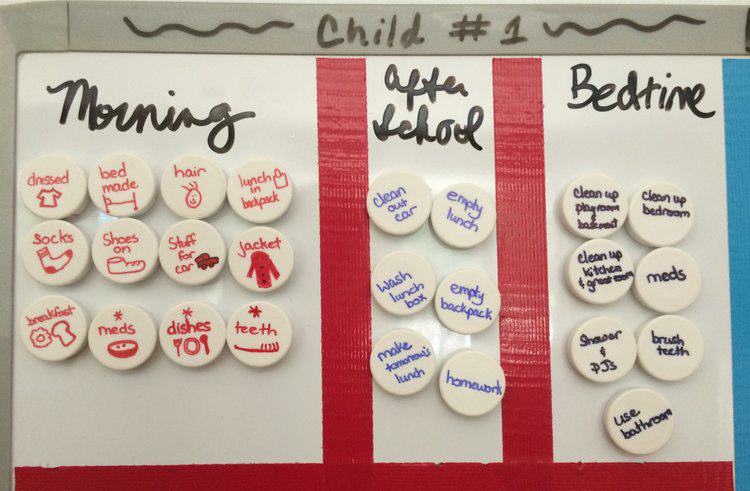
LEFT: My original “Morning Organization Magnet” board. It worked so well, we expanded it!
RIGHT: Our current “Morning Organization Magnet” board now covers after-school and bedtime.
Why Magnets?
- They’re “touchable.” Something about the tactile experience of touching, holding, and moving a magnet makes daily tasks much more engaging.
- They put the children in control, so there’s NO MORE NAGGING! The magnets have almost totally eliminated the need for me to remind my children of what they need to do each morning, afternoon, and evening.
- They’re “accountable.” The magnet board lets the children know if something needs to be done. I get to stay out of it. Most of the time.
- They’re durable. Magnets will last a long time. I don’t want to remake this board in a few months.
How It Works
I added labels in dry-erase marker to clearly mark each section for you. However, our board does not actually have any labels on them. (See image at the top of this post.) My children know exactly where all of their magnets are, when to use them, and where they go. So, skip a step and don’t worry about labels!
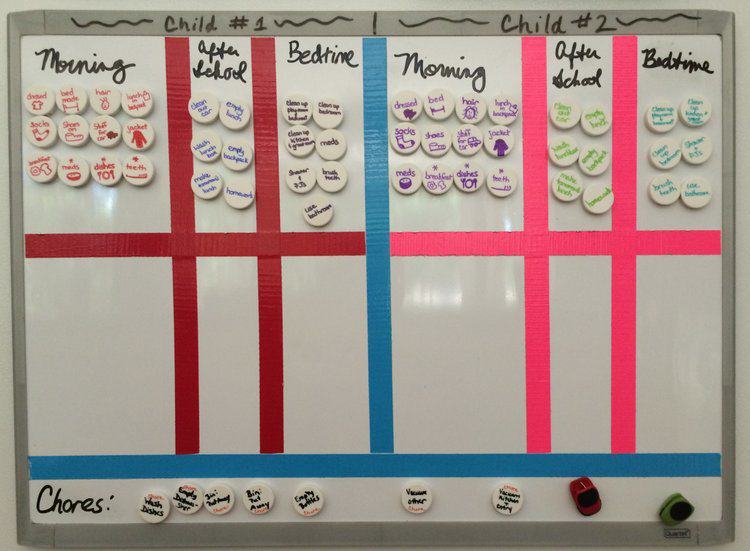
Each child has their own set of magnets on the fridge. As labeled in the photo above, the left section is for one child, the right section is for another child. I used their favorite color tape (red and pink, respectively) to divide their sections.
As each child completes a task, they move the corresponding magnet to the other side of the board. In the morning, I don’t let them eat breakfast until all “non-starred” magnets are moved. (The magnets with stars on them can only be done after breakfast, such as cleaning breakfast dishes and brushing teeth.)
By the time we are walking out of the door, all morning magnets will be in the bottom row of the magnet board. Ideally.
When the kids come home from school, they do their “after-school” tasks. As they complete each task, they move the corresponding magnet to the other side of the board.
Same for bedtime. At the end of the day, all magnets will be on the bottom of the magnet board. Tomorrow, the magnets will move, one-by-one to the top row of the board, as each task is done.
The “Chore” row is part of our allowance system.
The Timer
A very important element of this process —especially in the mornings— is the timer. The magnets help the children get all tasks done. The timer ensures they get everything done on time.
Children don’t argue with a timer. Timers, like the magnets, are “neutral third parties.” Children respond to a timer much better than they do to a nagging mom!
My favorite is the TimeTimer app. We set two timers: One to “Finish Breakfast” and one for “Out the Door.” The second timer puts us in the critical zone of being late, so they really start buzzing! Most days.

My favorite timer is the TimeTimer app. My kids can see time “shrinking,” which helps them manage pacing.
How to Make Your Morning Organization Magnet Board
- Create a “test board.” I can’t emphasize this enough! The Morning Organization Magnet Board will transform your life, but create a test board with card stock/file folders/ poster board and small sticky notes.
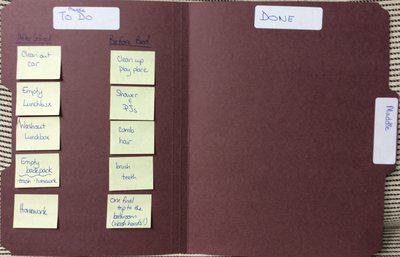
One of my “trial boards.” Made with a file folder and sticky notes. I created this before adding the “after-school” and “bedtime” magnets.
- Buy your supplies:
- 1 magnet board
One child (11×14″ board)
Two children (17×23″ board)
Three & four children (24×36″ board) - 3-M picture-hanging strips to hold board on fridge. (The adhesive that comes with the board is not removable and often not strong enough to hold the board with a lot of magnets.)
- Colored tape: 1 base color + 1 color for each child
- Magnets. Your test board will tell you how many to order.
- Permanent Markers, Extra-Fine Tip
- 1 magnet board
- Measure and mark a grid on your marker board. Use your test board as a template.
- Apply tape for the “lines.” Don’t fret; tape is very “forgiving.”
- Place magnets in each section before you label them. Use your test board to determine how many magnets you need.
- Label magnets with EXTRA FINE TIP permanent markers. Different color ink for each section of the board.
- Remove magnets from marker board before hanging on the wall.
- Apply the 3-M strips to a vertical surface in your kitchen (wall, fridge, door, etc).
- Wait 1 hour before placing magnets back on the board.
- Show your kids how it works. Plan a “trial” run for the next day. Expect to provide extra supervision during the first 2-3 days and extra enforcement during the first two weeks. But, it really doesn’t take any time at all for kids ages 3 & up to get the hang of it.
Morning Organization Magnet Board FAQs
Q: What if I have more or less than 2 kids?
A: Use a different size magnet board to accommodate your needs. Creating a “test board,” as described above, will help you determine the best size.
Q: What if the child did not do a task/move a magnet?
A: We charge them. Yes, that’s right. If they were supposed to do something and did not do it, it costs them anywhere from $0.25-$2.00, depending on their age and the number of offenses. (See Our Allowance System.)
The process of “charging them” is how we make these tasks “their problem.” We first tried rewarding our kids by giving points for every completed task. We then cashed those points in for an allowance. But, that was super difficult to monitor and was not motivating to them; if they didn’t earn one or two points on a given morning, they didn’t care. Now, if they are stalling about putting on their shoes, we first give them a warning. Then, we simply walk over to their Money Envelope and take money out of it. Wow! That gets them moving!
Q: What if my child can’t read yet?
A:Draw simple pictures on each magnet. We started this system when my youngest was 4 and not reading. I am not an artist by any means, but she quickly figured out each symbol. In our case, we happened to add the “after school” and “bedtime” magnets after she was able to read simple words. Here’s a close-up of my novice artwork:
Your child can’t read? Use illustrations.
Here’s a close-up of my novice artwork.
(By the time we added the “after-school” and “bedtime” magnets, my youngest could read, so I skipped those illustrations.)
Q: How do you use the bottom row, labeled “Chores”?
A: This row is optional and has nothing to do with “morning,” “after school,” or “bedtime.” Instead, it relates to our Allowance System.
OPTIONAL: “Morning Organization Magnets” for Mom
The morning organization magnets were such a success for my kids, I created my own version! Maybe it sounds crazy, but no two consecutive mornings are the same for me. Between travel, early-morning meetings, and late-night writing sessions, I have never developed a morning or bedtime routine for myself. Hence, Mom’s Morning Organization Magnet Board…
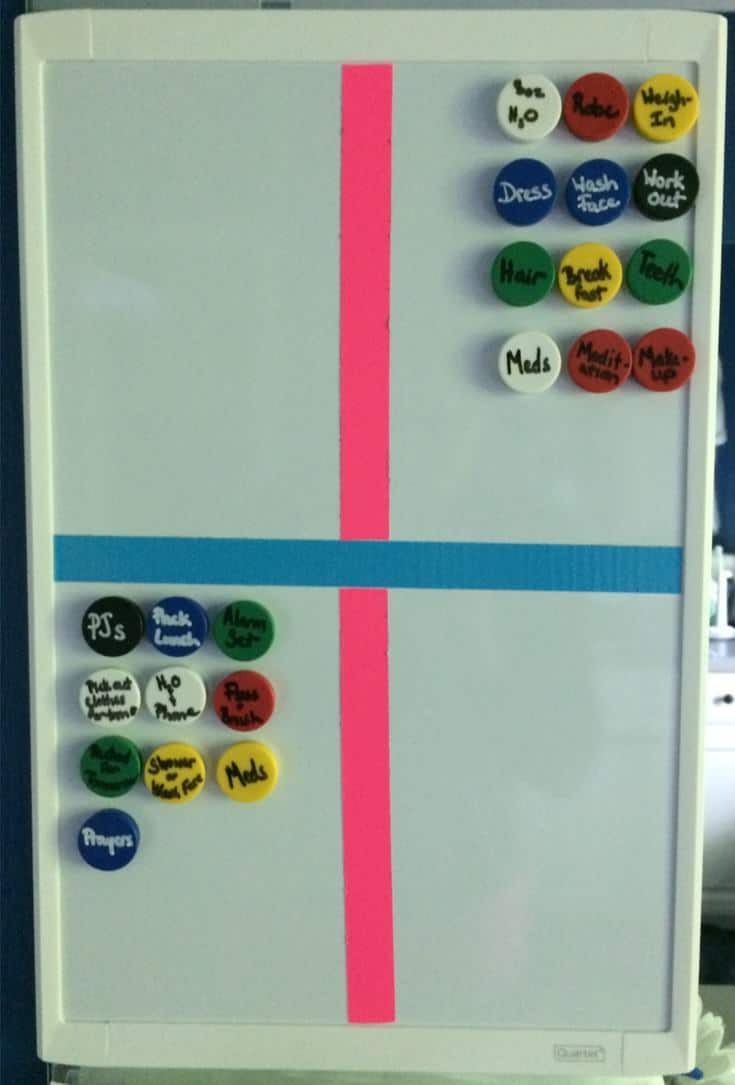
I keep my board in my bathroom. In this case, my morning organization magnets are on top and move left-to-right, across the pink line. Bedtime magnets are on the bottom. (Yes, this is different than the kids’ board that alternates from top-to-bottom and vice versa. There’s a reason, but it’s a long and irrelevant one.)
OPTIONAL: Traveling with a Magnet Board
Yes, I pack a magnet board on vacations! At first, my husband rolled his eyes at me, “You can’t be serious.”
“Yes, honey, I’m dead serious!”
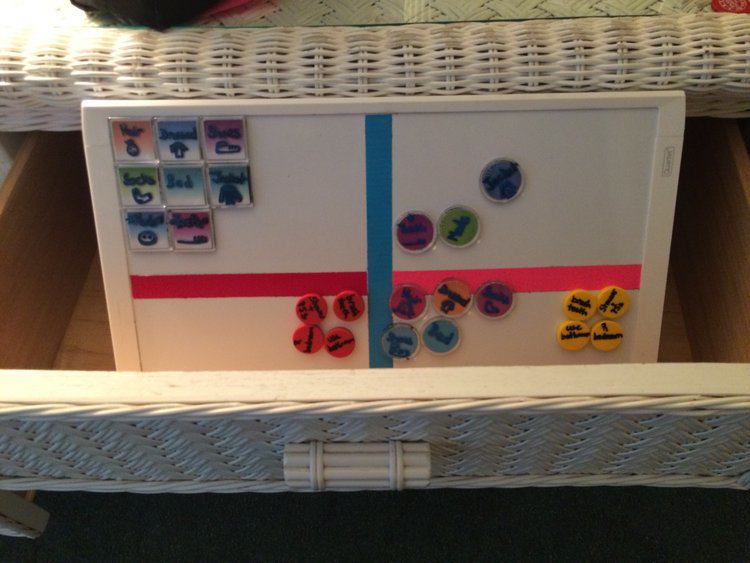
“Have magnets, will travel…peacefully!” This travel-sized magnet board has transformed our family vacations! I used a collection of “old” magnets to create a “travel board.” This picture shows our travel board propped in a dresser drawer of our hotel.
Here’s the story… Our family’s favorite vacation destination is Mackinac Island. On the island, my husband and I love to sit on the porch of our hotel in the evenings. It’s a lovely place to read and watch the freighters and ferries pass in the deep blue waters of the great lakes.
BUT, getting the children ready for bed and settled down can literally take hours. For years, this meant that one of us had to forgo our evening on the porch. Until the magnets came along! Since our kids are always begging for a souvenir on vacation, we struck a deal!
How to Use the Magnet Board on Vacation
Every night is worth between $2-$5. This depends on the length of the vacation: we aim for a grand total of $15-$25 for the whole vacation.
For every night that they “do all of their magnets,” they get paid. On the last day of the vacation, they get to purchase a souvenir of their choice, based on how much money they have earned for the week. (For some reason, mornings on vacation are not an issue. But, we still have them use the magnets to get ready in the morning, they just don’t get paid. Obviously, you could pay your children for peaceful mornings and evenings; simply start with a max payout/child and do the math accordingly.)
The Result
After the first night, my husband admitted that the travel board was PURE GENIUS! The results were miraculous! Our evenings were so peaceful. The children were so motivated (and rewarded) to take their own initiative for bedtime, it was amazing! I now keep a small “travel-size” magnet board in my suitcase so it’s always ready to go.
Simple Family Organization: Three Rules for Success
This is just one post in my series “Simple Family Organization.” Find a full directory of additional posts, here. I’ve been creating systems for students and businesses for more than 20 years. In that time, I’ve found three “rules” that make systems successful for all ages:
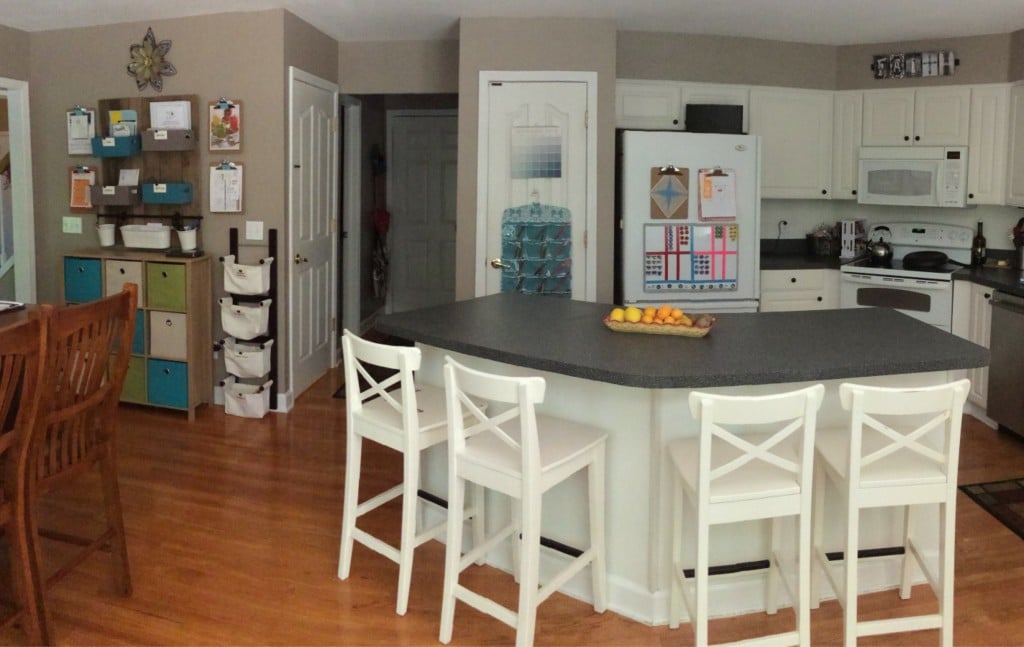
This picture of my kitchen shows all of my Simple Family Organization systems in place.
Three Rules for Success
1. They must be easily accessible. Everything must be within easy reach for every member of the family. Also, whenever possible, supplies should be accessible with just ONE HAND. If you need two hands to move or manipulate something, the rate of compliance drops significantly.
2. They must require little maintenance. I have found lots of beautiful systems on Pinterest. But, I always ask, “What’s required if I need to change something down the road?” (Such as add a new meal, or a new ‘task’?) If making adjustments in the future will require more than a few steps, I’ll never get around to doing it. So, I keep it simple from the start.
3. They must be “80% Successful or better.” Not one of my “Simple Family Organization Systems” has been used accurately, 100% of the time. Sometimes I forget. Sometimes the kids forget. Sometimes our rhythm is thrown off for some unforeseen reason. But, overall, these systems have made a dramatic improvement in our lives at least 80% of the time.
Make it happen!

Susan Kruger, M.Ed.
Mom & Founder of StudySkills.com
SK 05172022
Six Steps
Conquer the Chaos
Get Our Free Guide & Information on...
 How to Organize & Motivate Students for Success
"*" indicates required fields
Get Our FREE Curriculum Guide!

The SOAR® Curriculum

The most critical learning, organizing, and communication skills needed for school. Learn more here.
Who’s Using SOAR®?

SOAR® Guarantee

Click here to learn more.