Simple Family Meal Organization:
Easy Lunch and Dinner Menu Board
The Menu Board for Simple Family Meal Organization
Solves the problem of… having to figure out what to buy and prepare for lunches and dinner every day.
Additional benefits… the Menu Board also improves meal-time cooperation from the kids… and has them making their own lunches, with minimal fuss. It’s a fabulous tool for achieving simple family meal organization.

Once the “Morning Magnets” transformed my life, I was ready to tackle more…
For me, it’s the worst, most dreaded and annoying question ever, “WHAT’S FOR DINNER?”
And the second worst, most dreaded and annoying question ever, “WHAT DO YOU WANT FOR LUNCH?”
But, First… Two Common Problems with Menu Boards
I have found dozens of beauuuuutiful menu boards on the internet. But, they all had one of two hitches that interfere with effective family meal organization:
Hitch #1 – They required two hands to place meal selections in the correct place. (The ones made with clothespins, for example.) After 20 years of working with students, I’ve found that strategies requiring two hands have a very low rate of compliance!
Hitch #2 – What happens when I want to add a meal? Will I have to type it up on the computer, print it, pull out my paper-cutter to cut it out, cut out another piece of cardstock, glue the two together, then run to the nearby office supply store to have it laminated?
Uh, NO. I’m NOT doing that.
So, I trolled through a local craft store and found the most simple and brilliant solution: a jewelry organizer!
How the Menu Board Works
At the beginning of each week, we select craft sticks to determine what we want for lunch and dinner that week. We call it “playing sticks.” Ex: “Did you play your lunch sticks for this week?” “Have you played a dinner stick yet?”
The first two columns are for lunches, one column for each of my children. The last column (on the right) is for dinner selections. There are five rows on this organizer; one for each weekday. (We do leftovers or pizza on the weekends.) We each “play our sticks” during our Sunday Meeting.

Lunches
The first column is for Child #1. Second column for Child #2. (I should purchase a new organizer with space for my husband & me to plan our lunches, too!) Each child selects what they want for lunch that week. I have prepared craft sticks with lunch items written on each:
Green stick = main meal (includes a protein)
Red stick = fruit or vegetable
Yellow stick = snack
This system became a perfect transition to have my children make their own lunch! (My kindergartner needed a little support –both with reading the sticks and preparing her lunch– but not much.)
Selecting the sticks allows them to have a “voice” (aka “appropriate control”) over their lunch, which made them more cooperative about preparing –and eating– their lunch. Breaking it down into three elements makes it easy for them to know what to prepare. My kindergartner went from having a meltdown over making her lunch to methodically selecting sticks. (I now realize the meltdown was from sheer overwhelm.)
Now, it’s fascinating to watch her work through the process. When it’s time for her to make her lunch, she grabs the three sticks she selected at the beginning of the week and sets them on the counter. She slides the first stick closer to her, separating it from the rest of the pile. This allows her to focus on one thing. She prepares that portion of her lunch. Then, she moves on to the second stick. And, so on. The “lunch sticks” help her break the process down into manageable steps.
NOTE: The kids figured out a little “hack” of their own; they like to select the same items for two days in a row because they like to make lunch for two days at one time. (Their school provides a pizza lunch 1 day/week, so they only need four lunches, total.) Therefore, each meal, fruit/veggie, and snack has multiple craft sticks so it can be selected for multiple lunches each week.
I found inspiration for the “lunch sticks” using two lists found on Pinterest (below). Obviously, selecting items I know my children will eat.
Dinners
I combed through the family’s favorite recipes (not many) and put them on large craft sticks.
We’ve always eaten tacos on Monday, so that leaves four remaining days of the week. With four family members, each person can “play” one dinner stick each week. Soooo simple!
On the back of each craft stick, I’ve listed the major ingredients needed, so making the grocery list is a breeze! (Feel free to download my customizable grocery list. All of the ingredients from our “craft stick” lunches and dinners are included on this list. All I have to do is write the quantity needed of each item.)
An unexpected benefit of this process was that the kids became much more cooperative about eating all meals, even those they did not select. Not 100% more cooperative, but easily 80% more cooperative. I think their cooperation increased because they felt included and empowered in the whole “dinner-selection” process.
FAQs
Q: What if I have more than two kids?
A: You’ll purchase a jewelry organizer with the right amount of pockets for your family. You can still achieve simple family meal organization.
Q: What if I have more than four or five people in my family for selecting dinners?
A: Determine a way to fairly rotate meal-selection privileges.
Q: What if you want to add a dinner or lunch item?
A: So glad you asked! This is such an important part of the process… I simply keep a small baggie of extra craft sticks in my “junk drawer.” Adding a stick is as simple as: opening the junk drawer, pulling out a stick, grabbing a permanent marker, and writing on the stick. Voila! New stick added in less than 10 seconds. Easy peasy for family meal organization.

Updating the Menu Board is easy-peasy! Extra craft sticks are kept in a baggie in our kitchen “junk drawer.”
How to Make a Menu Board
1. Create a list of dinners that you are willing to prepare on a regular basis. Try to include a “favorite” for each member of the family.
2. Create a list of lunch items. Fold a piece of 8.5×11 paper into 3 columns: “Main Meal,” “Fruits/Veggies,” & “Snacks.” Start filling in your list. For inspiration, use lists from Pinterest for inspiration, if needed.
3. Purchase supplies:
- Organizer:
- Colored Craft Sticks
(thin) for lunch items.
- Jumbo craft sticks for dinner items.
- 4 Cups
- Permanent marker
- 3-M hook (to hang organizer on the wall)
4. Label each stick. Use your lists from Steps #1 & 2 as a reference. (Don’t forget to add the ingredients on the back of the dinner sticks!)
5. Attach your hook to the wall. Wait 1 hour.
6. Hang the organizer on the wall.
7. Attach the cup holder to the wall.
8. “Play” your sticks!
9. NEVER, EVER, EVER again fuss with the two most dreaded questions in the world!
Simple Family Organization: Three Rules for Success
This is just one post in my series “Simple Family Organization.” Find a full directory of additional posts, here. I’ve been creating systems for students and businesses for more than 20 years. In that time, I’ve found three “rules” that make systems successful for all ages:
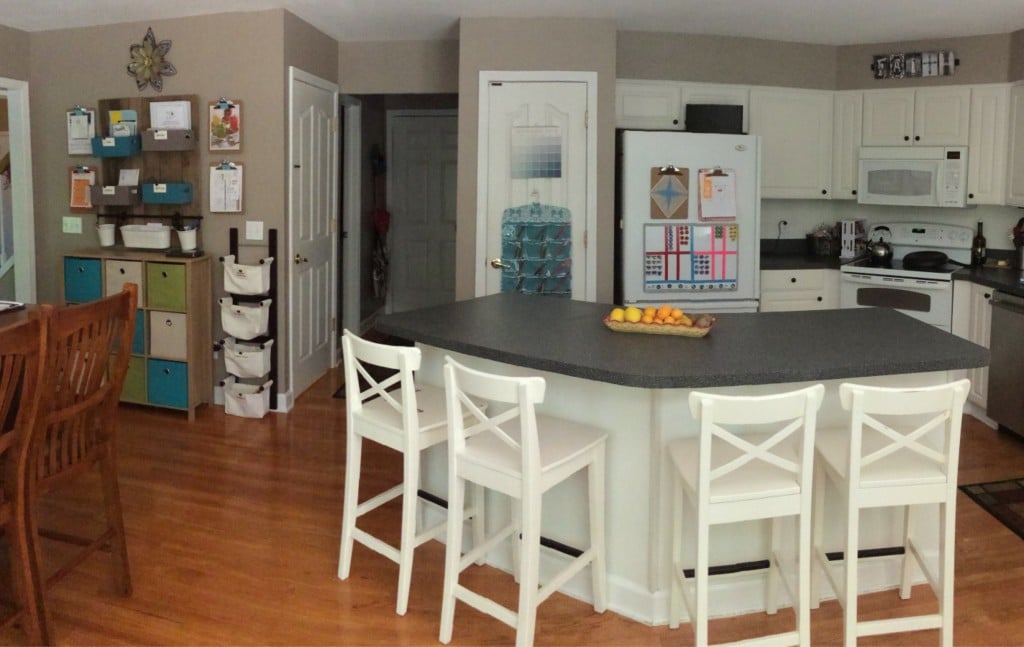
This picture of my kitchen shows all of my Simple Family Organization systems in place.
Three Rules for Success
1. They must be easily accessible. Everything must be within easy reach for every member of the family. Also, whenever possible, supplies should be accessible with just ONE HAND. If you need two hands to move or manipulate something, the rate of compliance drops significantly.
2. They must require little maintenance. I have found lots of beautiful systems on Pinterest. But, I always ask, “What’s required if I need to change something down the road?” (Such as add a new meal, or a new ‘task’?) If making adjustments in the future will require more than a few steps, I’ll never get around to doing it. So, I keep it simple from the start.
3. They must be “80% Successful or better.” Not one of my “Simple Family Organization Systems” has been used accurately, 100% of the time. Sometimes I forget. Sometimes the kids forget. Sometimes our rhythm is thrown off for some unforeseen reason. But, overall, these systems have made a dramatic improvement in our lives at least 80% of the time.
Make it happen!

Susan Kruger, M.Ed.
Mom & Founder of StudySkills.com
Six Steps
Conquer the Chaos
Get Our Free Guide & Information on...
 How to Organize & Motivate Students for Success
"*" indicates required fields
Get Our FREE Curriculum Guide!

The SOAR® Curriculum

The most critical learning, organizing, and communication skills needed for school. Learn more here.
Who’s Using SOAR®?

SOAR® Guarantee

Click here to learn more.